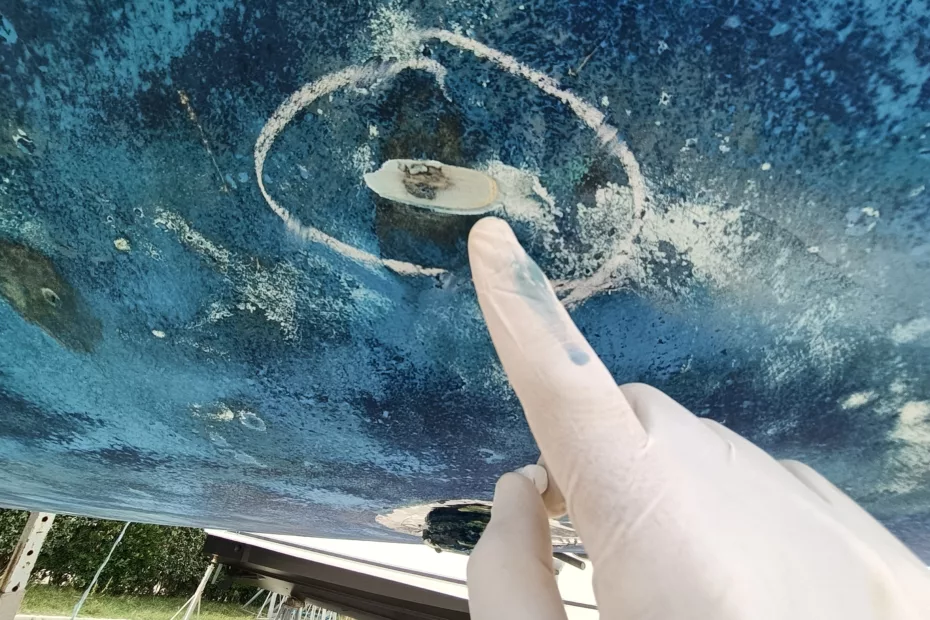
Osmosis is a common issue faced by many fiberglass boat owners. Understanding this phenomenon and knowing the appropriate repair techniques is essential for preserving the integrity of your boat. In this article, we will explore in detail the osmosis process, how to identify it, and techniques for repairing your boat without panic.
What is Osmosis?
Osmosis occurs when water permeates the material, particularly in fiberglass structures, through a semi-permeable membrane. This process leads to the formation of blisters and bubbles, which can damage the coating and compromise the integrity of the hull; as the gelcoat deteriorates, the permeability of the underlying fiberglass increases. The presence of moisture not only affects the performance of the boat but can also lead to significant long-term damage.
Identifying Signs of Osmosis
Recognizing the signs of osmosis is the first step toward effective repair. Here are some key indicators:
- Blisters and Bubbles: Small blisters or raised areas on the outer surface of the hull.
- Musty Odor: An unpleasant smell inside the boat may indicate the presence of moisture.
- Aesthetic Deterioration: The gel coat may appear dull or show signs of flaking in certain areas.
Techniques for Repairing Osmosis
If you identify signs of osmosis, follow these steps for effective repair.
1. Inspection and Assessment
First, carefully inspect the damaged area to assess the extent of the problem. Use a screwdriver or a pointed tool to test the hardness of the surface, looking for areas that feel “hollow.” Additionally, if liquid with an acidic odor seeps from the blisters, it’s a strong indicator of the issue.
2. Removal of Damaged Fiberglass
Use a sander to remove the damaged fiberglass. Eliminate all traces of compromised material, ensuring that you do not damage the surrounding areas. It’s advisable to work in a well-ventilated area and wear appropriate protective equipment. Alternatively, consider consulting a shipyard, which may opt for sandblasting if the phenomenon is widespread to expose all affected areas.
3. Drying the Area
After removing the damaged material, it is crucial to thoroughly dry the area. Use an industrial fan or an infrared lamp to accelerate the drying process. This step is essential to prevent mold formation and ensure good adhesion of the new material.
4. Application of Osmosis Inhibitors
Once the substrate is dry, apply an osmosis inhibitor, a specific product designed to treat and seal the damaged area before proceeding with the repair. Follow the manufacturer’s instructions to ensure proper application.
5. Repair with New Fiberglass Only if Necessary
After treatment, prepare a mixture of resin and fiberglass. Apply the material in layers, ensuring that each layer overlaps correctly. Allow each layer to dry according to the manufacturer’s instructions. Only proceed with this step if the damaged areas have affected the fiberglass layers.
6. Sanding and Finishing
When the repair is dry, use sandpaper to level the surface. Then apply a gel coat, epoxy putties, and finally a protective paint to restore aesthetics and protect against further moisture ingress.
Prevention of Osmosis
Preventing osmosis is the best strategy. Here are some useful tips:
- Keep the Boat Dry: Avoid leaving the boat in stagnant water for extended periods.
- Regular Checks: Conduct periodic inspections of the hull and gel coat.
Regenerate Response
